How Do You Read a Load Chart? A Guide for Safe Crane Operations
When operating a crane, knowing how much weight the machine can safely lift is one of the most important parts of the job. A crane may have impressive lifting power, but every lift has limits based on factors such as boom length, operating radius, configuration, and ground conditions. That is where a load chart comes in.
A crane load chart is a critical tool that helps operators determine whether a lift can be performed safely. Understanding how to read one allows operators, riggers, and project managers to make informed decisions before moving heavy materials.
What Is a Crane Load Chart?
A crane load chart is a document provided by the manufacturer that outlines the crane’s maximum lifting capacity under different operating conditions. It shows how much weight the crane can safely lift depending on variables such as:
- Boom length
- Boom angle
- Lift radius
- Counterweight configuration
- Outrigger position
- Jib or attachment use
- Crane setup and operating mode
Every crane model has its own specific load chart. Operators should always use the chart designed for the exact crane configuration being used.
Why Are Load Charts Important?
Load charts help prevent crane overloads, which can lead to dangerous situations such as:
- Crane tipping
- Structural damage
- Equipment failure
- Dropped loads
- Serious injuries or fatalities
A crane’s maximum lifting capacity is not a single number. A crane that can lift 100 tons close to its center may only be able to lift a fraction of that weight when reaching farther away. Load charts provide the information needed to understand these changing limits.
Understanding the Key Sections of a Load Chart
While load charts vary by manufacturer, most contain similar information. Here are the main sections operators need to understand.
1. Crane Configuration
Before reading any numbers, confirm the crane setup matches the load chart being used.
The configuration may include:
- Crane model
- Counterweight amount
- Outrigger extension
- Boom type
- Boom length
- Jib attachment
- Ground or crawler setup
A chart for a crane with fully extended outriggers may show higher capacities than the same crane working on partially extended outriggers or tires.
2. Lift Radius
The lift radius is the horizontal distance between the crane’s center of rotation and the center of the suspended load.
As the radius increases, the crane’s lifting capacity generally decreases. This is because the load creates more leverage against the crane, making stability more challenging.
For example:
- A crane may lift its maximum capacity when the load is close to the machine.
- The same crane may have a much lower capacity when the boom is extended and the load is farther away.
Always identify the required working radius before determining lifting capacity.
3. Boom Length and Angle
The boom is one of the biggest factors affecting lifting capacity.
A load chart will typically show different capacities depending on:
- Boom length
- Boom angle
- Boom extension
A shorter boom with a steep angle may handle heavier loads, while a longer boom reaching outward will reduce capacity.
Operators must know the planned boom configuration before selecting the correct section of the chart.
4. Rated Load Capacity
The rated load capacity is the maximum weight the crane can safely lift under specific conditions.
This number includes more than just the object being lifted. The total load must account for:
- The material being lifted
- Rigging equipment
- Slings
- Shackles
- Hooks
- Lifting attachments
For example, if a load weighs 18,000 pounds and the rigging weighs 1,000 pounds, the crane must be rated for at least 19,000 pounds under those operating conditions.
How to Read a Load Chart Step by Step
Step 1: Identify the Crane Setup
Start by confirming:
- Crane model
- Counterweight configuration
- Outrigger position
- Boom type
- Attachments being used
Using the wrong chart or configuration can result in an unsafe lift.
Step 2: Determine the Load Weight
Calculate the total lifted weight, including:
- The load itself
- All rigging equipment
- Any attachments connected to the load
Never estimate when an accurate weight is available.
Step 3: Determine the Required Lift Radius
Measure the distance from the crane’s center of rotation to where the load will be placed.
This measurement determines which capacity column or row applies.
Step 4: Find the Correct Boom Length
Locate the section of the chart that matches the planned boom length.
If the boom length falls between listed values, operators should follow manufacturer guidance rather than assuming they can use the higher capacity.
Step 5: Check the Maximum Allowed Capacity
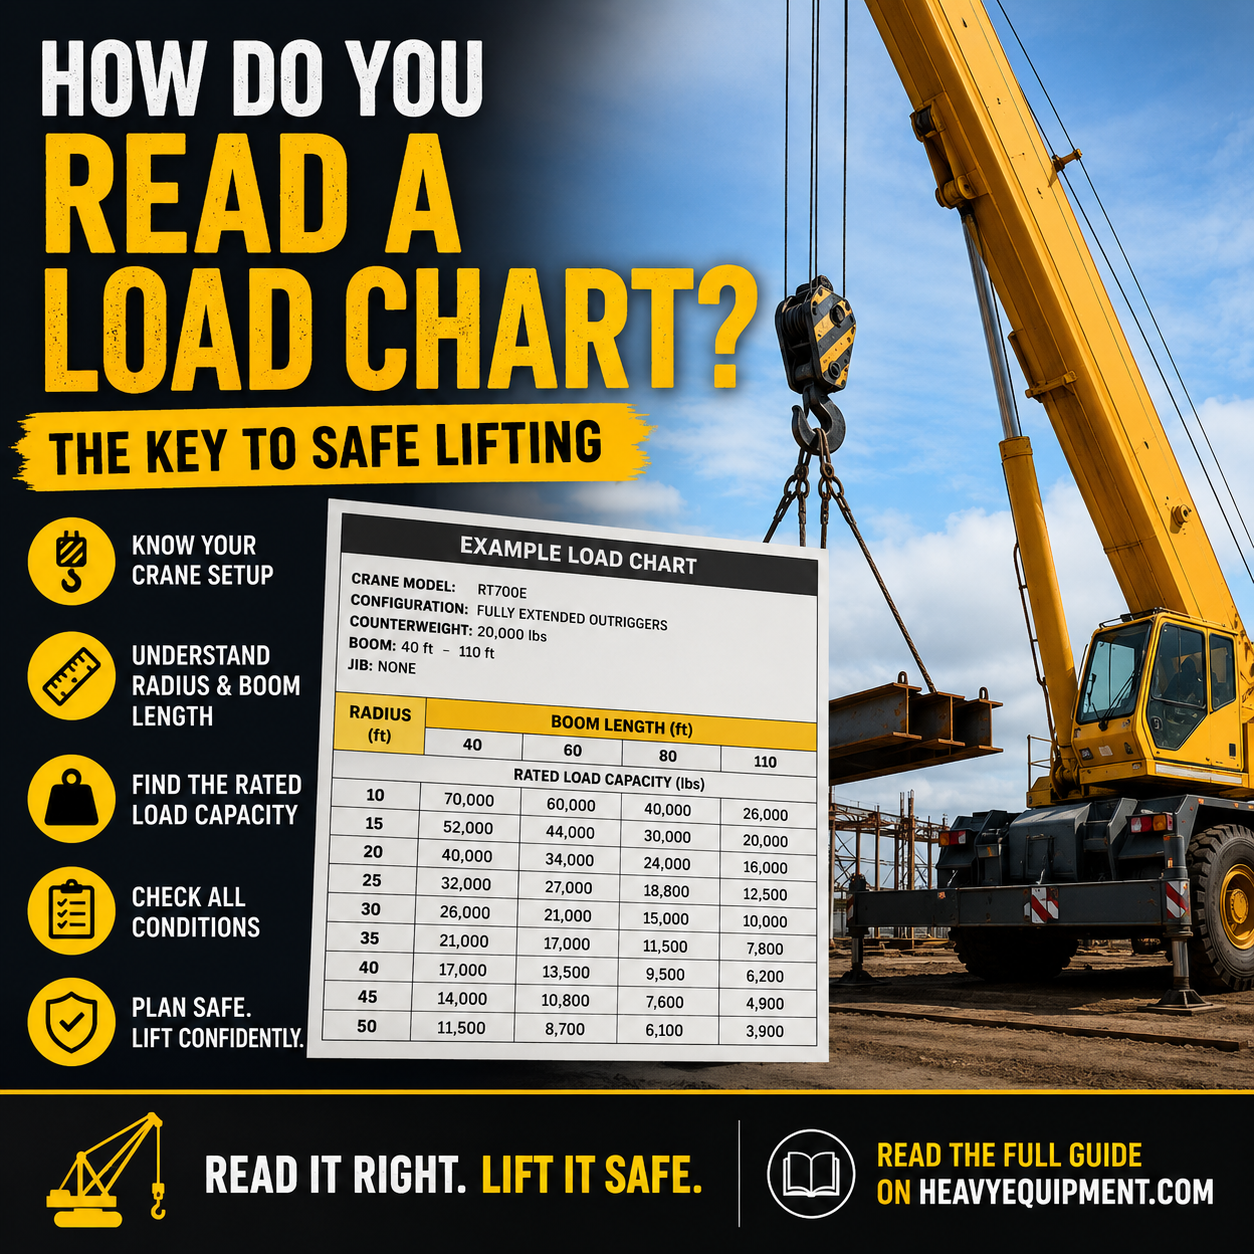
Find the intersection between the correct boom length and operating radius. This number represents the maximum allowable load for that specific setup.
The planned load must be equal to or less than this capacity.
Step 6: Consider Additional Restrictions
Load charts may include notes or warnings regarding:
- Wind conditions
- Side loading
- Travel with a suspended load
- 360-degree versus over-front lifting
- Ground stability
- Special attachments
These details are just as important as the capacity numbers.
Common Mistakes When Reading Load Charts
Even experienced operators must pay close attention when planning lifts. Common mistakes include:
Using the Wrong Load Chart
Different crane models and configurations have different capacities. Always verify that the chart matches the exact machine setup.
Forgetting Rigging Weight
A load does not include only the object being lifted. Slings, hooks, spreader bars, and other equipment add to the total weight.
Confusing Radius Measurements
Small differences in radius can significantly affect capacity, especially during heavy lifts.
Ignoring Outrigger Position
A crane operating with partially extended outriggers may have a different capacity than one fully supported.
Assuming Maximum Capacity Applies Everywhere
A crane’s advertised lifting capacity is often its best-case scenario. Actual lifting capacity changes throughout the working range.
Digital Load Charts and Crane Technology
Modern cranes increasingly use computerized systems that help operators monitor lifting conditions in real time. Many machines feature:
- Load moment indicators
- Rated capacity limiters
- Digital displays
- Automatic safety warnings
- Boom angle and radius sensors
These technologies improve safety, but operators still need to understand load charts. Electronic systems depend on accurate setup information and proper operation.
Load Charts: A Critical Skill for Every Crane Operator
Reading a load chart is a fundamental skill in crane operation. It combines knowledge of the equipment, careful planning, and attention to detail to ensure every lift is performed safely.
A successful lift begins long before the crane moves. By understanding the relationship between load weight, radius, boom configuration, and capacity limits, operators can make safer decisions and keep projects moving efficiently.
Whether lifting steel beams, construction materials, machinery, or specialized equipment, the load chart is the roadmap that helps turn a planned lift into a safe one.